In the fall of 1989, I delivered a presentation at the National Conference of Community Associations Institute in Dallas, Texas. My presentation was about why buildings leak. At that point in my career, I had been involved with thousands of industrial, commercial, and municipal properties but probably fewer than 100 condominiums. Fast forward to 2007 and, while the number of non-residential projects in our portfolio has grown steadily, the list of condominium properties is approaching 1,000 associations containing tens of thousands of homes.
Against this backdrop, I have also become something of a weather buff. Not being a meteorologist, I have been somewhat puzzled by the number of 100-Year Storms that have taken place in this country during the past 20 years. The combination of those storms and the condominiums with which I work has resulted in one heck of a lot of leaks for this writer. So why do buildings leak in bad weather?
From the Outside In
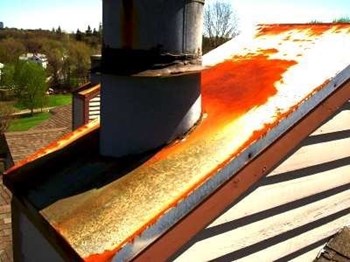
Faced with a leak, one of the first places a homeowner, community association manager, or engineer must look to block or repair the intrusion is the building envelope. For too long, the construction industry targeted roofing systems as the prime suspect whenever a leak developed, particularly if water affected ceiling areas. But rain, and particularly wind-driven rain from noreasters, doesn't impact only the roof of a building. Instead, the entire "skin" of the building is at risk, and that skin includes the roof, the exterior walls, the windows, the doors, the vents, the foundation, the chimneys, the chimney caps, the skylights, and so on. If a building is leaking, the first step to formulate a solution is a thorough examination of a all of these elements, and the examination goes by the user-unfriendly name of a Building Envelope Condition Survey. The survey takes stock of a building's ability to combat leakage at each possible point of intrusion. The Building Envelope Consultant who is summoned to perform the survey acts as a detective, either before or after the leakage occurs, and evaluates the integration of each of the building's elements, in combination with flashing.
Identifying the Culprits
Among the common building envelope components, a number of culprits are most often responsible for leakage. They run the gamut from ground-level opportunities for water to seep in to roof-high possibilities for intrusion.
Foundations
Most buildings have one of the two common types of foundations: slab-on-grade or full-depth (with basement). Water problems most often occur with full-depth foundations rather than slab-on-grade. The problem most often results from the fact that although there is water in the ground year-round, during the wet time of year, usually between October and May, the level of the water (groundwater) rises significantly. During extreme rainstorms, ground saturation at even higher levels is common because it takes time (how much time depends on the type of soil) for rainwater to percolate down to the groundwater level. Partially frozen ground, or ground containing a lot of ledge, makes the process take even longer. Most concrete foundations are ill-equipped to handle this water and keep it out of basements, and the situation worsens if the concrete is cracked. But—like death and taxes —homeowners must be aware of two facts of life: any concrete basement will ultimately have a crack, and cracks are inevitable.
To combat water intrusions in a perfect world, every full-depth foundation would have:
• Waterproofing (sheet variety is preferred) completely covering the outside of the wall, including the footing, and all penetrations (sewer lines, for instance) sealed.
• Well-draining fill (for example, sandy gravel) installed against the outside of the wall down to the footing so water percolates rapidly from the ground surface down to the foundation drain.
• Perforated pipe set in crushed stone and wrapped in filter fabric surrounding the entire foundation. The pipe should be installed at a level below the basement slab and oriented to carry water away from the building to a remote area. At that remote area, the water can spill to daylight (if grading allows) or terminate in an appropriate drainage structure (drywell).
•Grading at the ground surface, so the ground slopes consistently away from the foundation.
All roof runoff, preferably contained in gutters and downspouts, should end up in underground solid piping that terminates in a manner similar to the foundation drains.
Exterior Walls
In a perfect construction world, each and every exterior building wall would include the following watertight components:
• An exposed surface made of a durable (durable against rain, wind, heat, cold, impact, ultraviolet light, ozone, and so forth) finish material. Options include but are not limited to brick, stone, metal panels, and wood siding.
• A secondary weather barrier installed behind the exposed surface to repel any water (particularly wind-driven rain) that might penetrate the exposed surface. The barrier should direct the water back to the outside.
• Flashings at critical locations (windows, doors, balconies) to repel water back to the outside.
• A structural wall system that adequately supports the exposed surface and the secondary weather barrier as well as all additional loading, including interior flooring systems.
Windows and Doors
Any penetration in exterior walls, but most importantly windows and doors, must be watertight. In today's marketplace, windows come in five categories, each meant for a different type of construction or exposure (for instance, high rise on the ocean versus one or two stories well inland). The categories are Residential, Light Commercial, Commercial, Heavy Commercial, and Architectural. Windows and doors undergo quantifying tests to rate their performance for air infiltration, water penetration, and structural performance. The goal for the homeowner or builder shopping for a window or door is to select a properly rated window or door for the opening in the wall and surround it with the correct flashing.
Roofs
Higher up, water problems also crop up in the roof(s). For discussion purposes, there are two basic styles of roofs: low slope and steep slope. Low slope roofs—often called flat roofs (and some really are flat!)—must be designed to hold water (think bathtub). Steep slope roofs, on the other hand, primarily shed water (think umbrella).
A flat roof's most predominant feature is the continuous roof membrane, which years ago consisted of a sandwich of roofing felts and hot asphalt, covered with pea gravel. For the better part of the past 30 years, in New England anyway, roofing membranes have generally fallen into two categories, thermoplastics and thermosets. The thermoplastics are relatively small (6' x 100', for example) rolled-up sheets of PVC, CSPE, TPO, and so forth, which are rolled out, overlapped, and heat-welded together. Thermosets, by contrast, are generally larger sheets (20' x 100' for example) of rubber that are rolled out, overlapped, and glued together. Both categories of material have excellent weathering characteristics (although this was not always the case), and the only real difference between the two is in the seaming. Today, the heat-welded seams seem (pun intended) to hold up better over the long term.
Much as roofing products have improved, particularly for flat roofs, the industry has finally recognized that a roof with a consistent slope offers a hugely beneficial performance (what took them so long?). If not built into the structure of the roof itself, slope (usually 1/8" per foot to 1/4" per foot) is usually created by incorporating tapered insulation beneath the membrane.
Steep roofing has much to recommend it, but first among its benefits is that it sheds water very quickly under most conditions and requires little if any watertightness of underlayments (felt, ice and water protection, etc.). Most shingle steep roofing installed in the 1970s and '80s, when many condominiums were built, was installed atop bare plywood without
Under optimum conditions, a typical townhouse condominium building should be topped with:
• A good "foundation," meaning sufficient support for the roofing system. The rafters or trusses should be of sufficient size and strength and have adequate fastening. The plywood roof deck should also be of sufficient strength and adequately fastened.
• Extensive ice and water protection at eaves, valleys, roof-to-wall intersections, and penetrations (skylights, vents, etc.). Asphalt felt should cover all other roof deck areas.
• Heavyweight asphalt shingles (in this day and age, using lightweight, relatively short-lived shingles just doesn't make economic sense) fastened in accordance with the manufacturer's requirements, with hurricane nailing in high wind areas.
• Flashings, flashings, and more flashings in critical areas.
The one drawback of steep slope roofing is a significant drawback. Ice damming is a unique phenomenon associated with this type of roof. To form an ice dam, melt water (snow melted during cold weather by the heat escaping through the roof) flows down the roof to the cold eave and refreezes. The ice then serves to retain subsequent melt water. No matter what kind of shingle is installed on a steep slope roof, standing water cannot be kept outside the building by shingles alone. Installing a self-sealing layer of ice and water protection (around nails) is critical in all areas where ice damming (or excessive snow/slush) is expected.
With the foundation correctly sealed and drained, the roof correctly pitched, sealed, and shingled, and the exterior walls correctly wrapped and clad, a building can look forward to 25 years with nary a drip leaking in.


Leave a Comment